

Night Sky Drawing Pencil Easy
A star is something that anyone would be familiar with as we've all seen them in the night sky. While we've all seen the real thing, the symbol of a star is also one that's instantly recognizable.
It can be a sign of a job well done or even show that you're someone really famous!
The star symbol may look simple, but it can be a bit tricky to get right, so if you'd like to learn how to draw a star yourself then you're in the right place!
We created this simple guide on how to draw a star in 7 easy steps to make it easier than ever!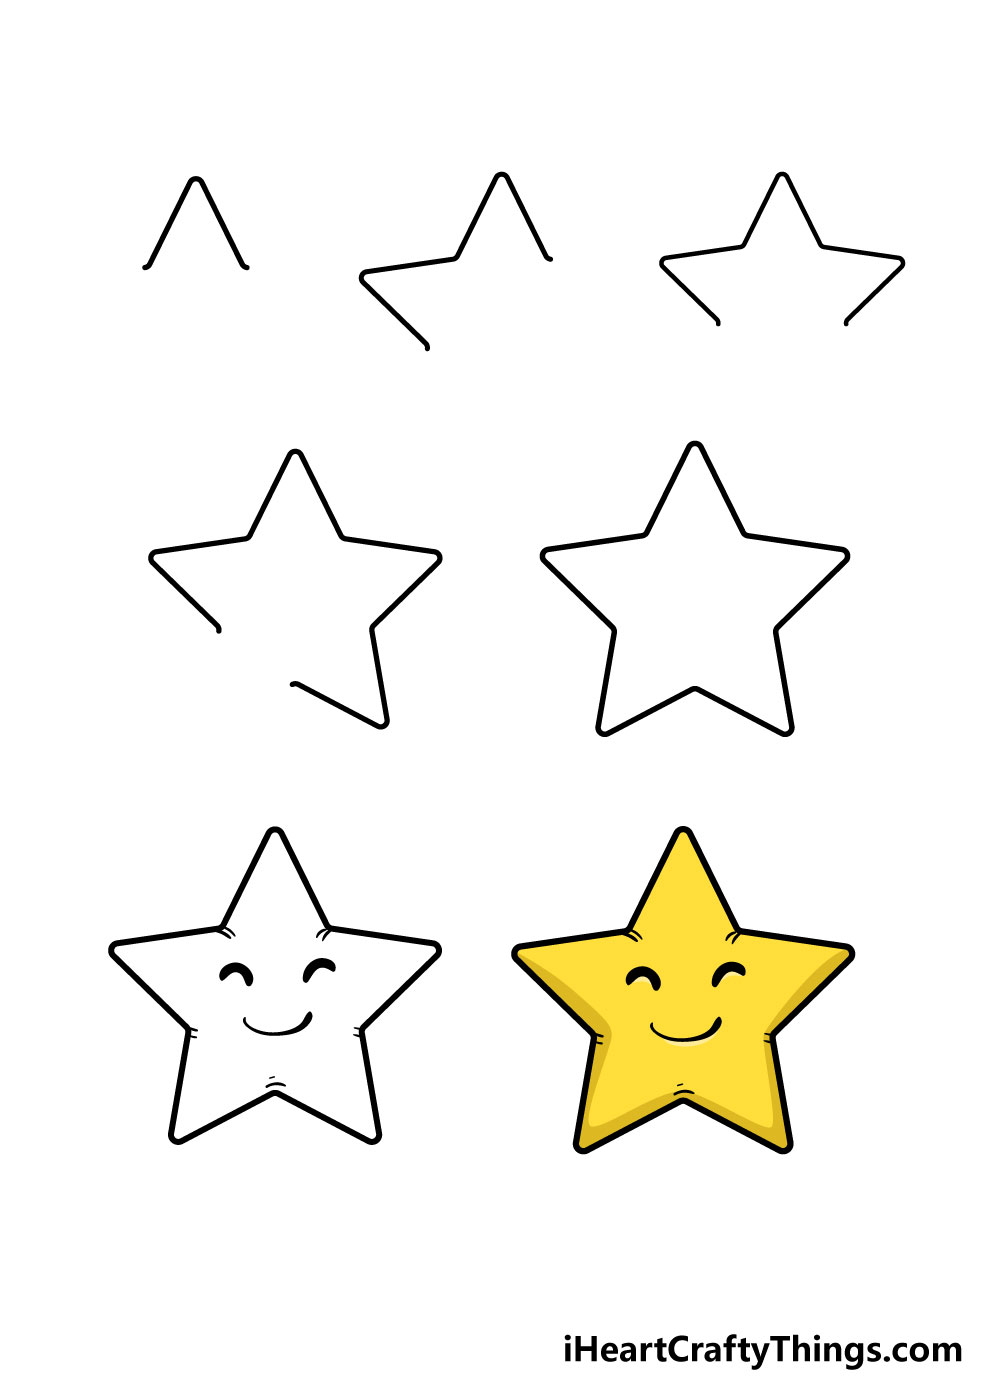
What's in this Blog Post
- How to Draw a Star – Let's get Started!
- Step 1
- Step 2 – Next, draw in the left arm of the star
- Step 3 – Next, draw in the next arm of the star
- Step 4 – Now draw in the lower right arm
- Step 5 – Next you will be adding in the final arm of the star
- Step 6 – Now draw in a face and final details
- Step 7 – Now finish it off with some color
- Your Star Drawing is Complete
How to Draw a Star – Let's get Started!
Step 1
For our first step in this guide on how to draw a star, we will be starting with something simple yet important.
I would highly recommend using a ruler while working on the outline of your star as well, to make sure that the sizes are consistent.
We will be drawing in the first part of your star drawing, and to do that we will start by drawing what looks like a triangle with no bottom.
To make things easier, we will refer to each part of the star as an arm.
Where the lines end, try to leave a bit of a curve as you can see in the reference image, as that is where you will be connecting the other sides.
Step 2 – Next, draw in the left arm of the star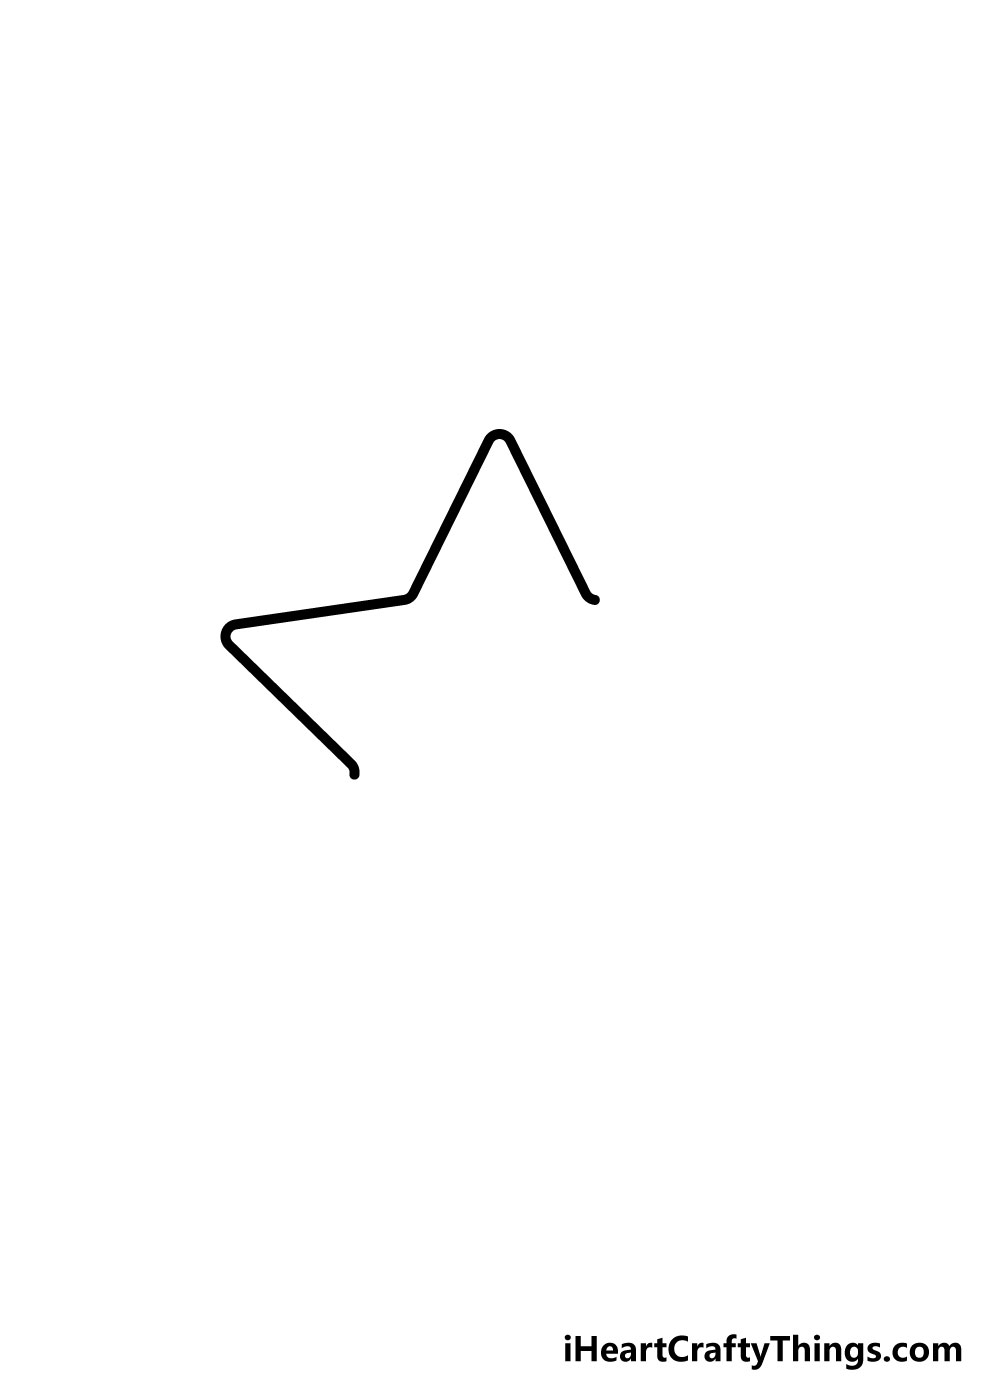
For the next few steps, we will be replicating the first arm of the starfish that you drew in step 1.
To keep the arms close to the same length, it can help to measure how long the lines of the first star arm are and then make sure that the lines that will form the other arms are of the same length.
Step 3 – Next, draw in the next arm of the star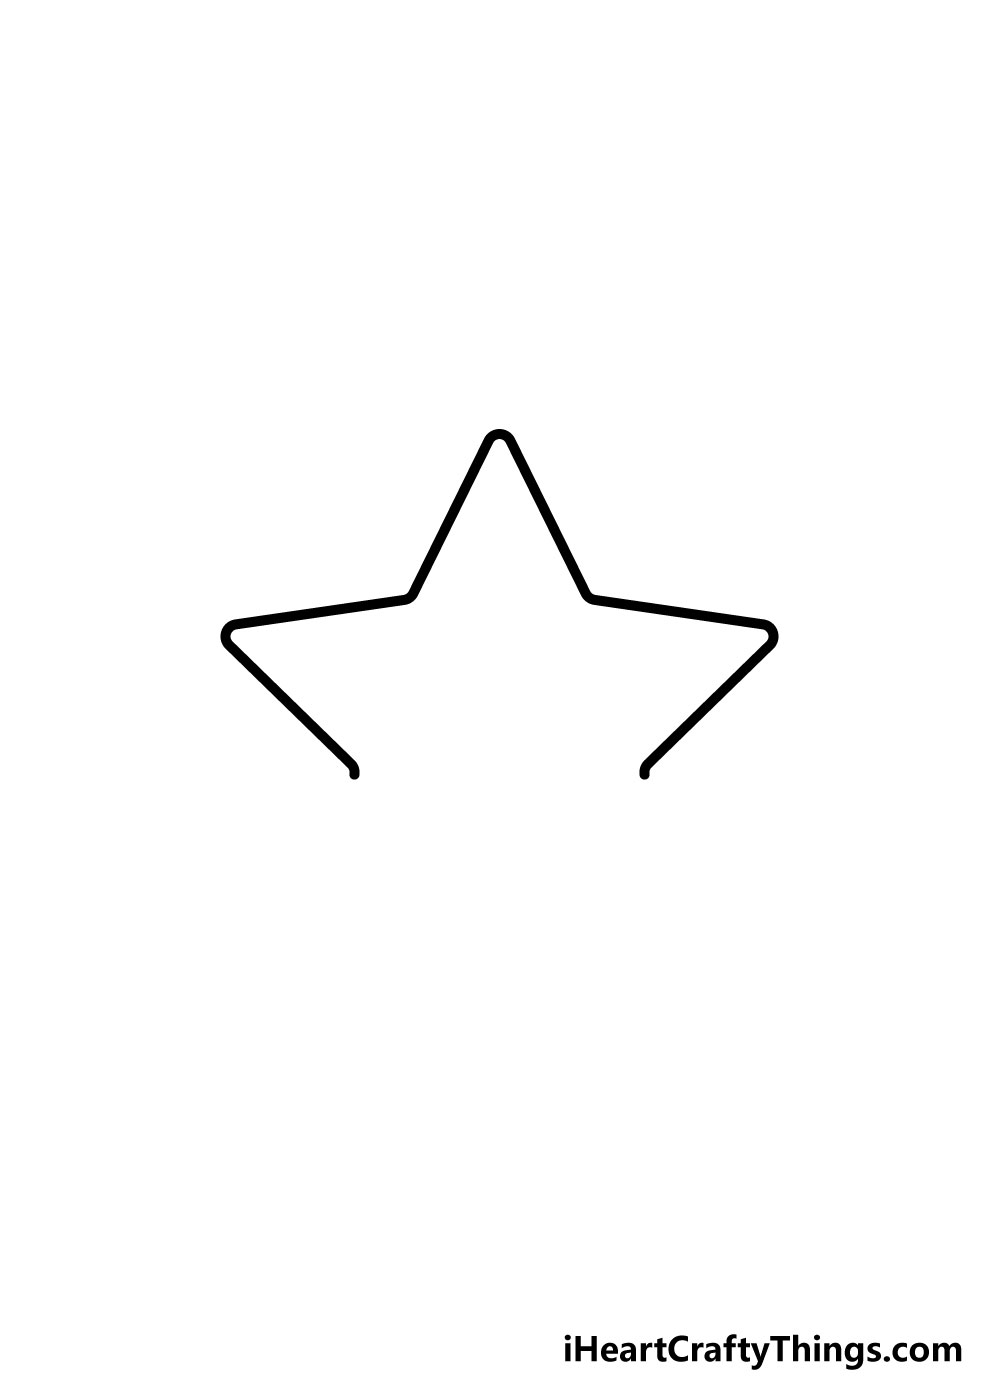
For the third step of your star drawing, we will be drawing in the right arm of the star.
This one should be a bit easier, as you will be creating a mirror image of the left arm, so you have an idea of the angle it should be at.
Remember that measuring how long the other arm is will help to make the length of this one consistent with the rest.
Step 4 – Now draw in the lower right arm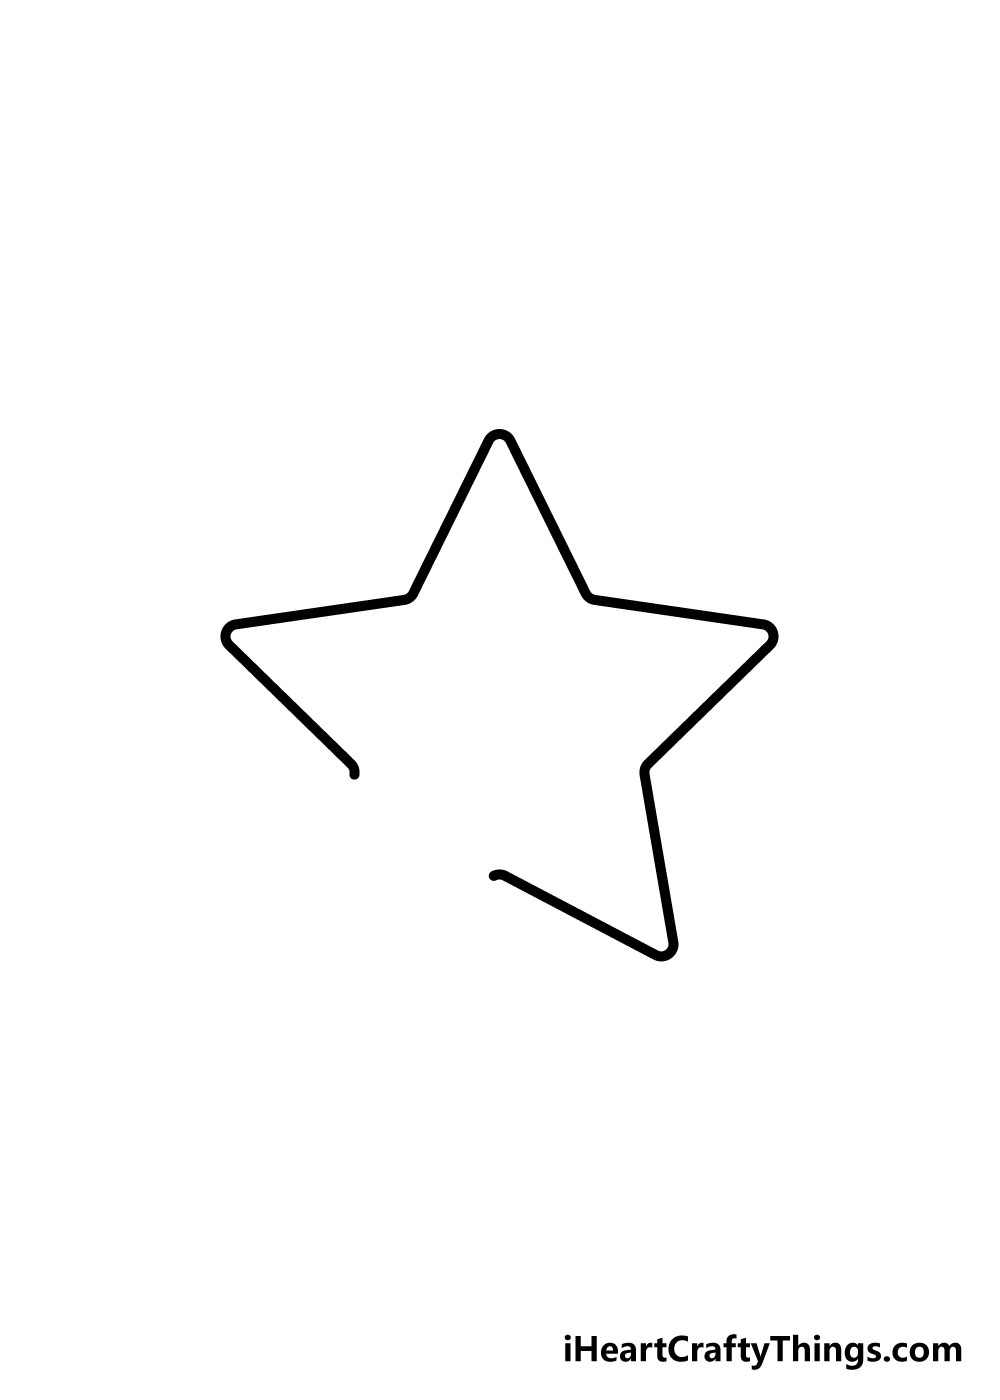
In step 4 of this guide on how to draw a star, we will be adding in the lower right arm of the star. Taking everything you've learned from drawing the other three, this one should be much easier!
The trickiest part is getting the angle right, but if you keep your measurements consistent and refer to the reference image it can be a lot easier!
With a bit of preparation and practice I'm sure you'll get the hang of it.
Step 5 – Next you will be adding in the final arm of the star
You've come this far, and you're almost there! This should be the easiest arm of the star to draw in, as you have the other arms to use as your guide.
Getting the angle of the arms right can be a bit tricky, so you could draw your star in pencil first and then go over in pen when you're happy with it.
If you do use pencil first, make sure that the pen ink you draw over it with is dry before you erase the pencil! If you erase too soon, that can make the ink smudge, so it's important to take this step slowly.
Step 6 – Now draw in a face and final details
Now that your star shape is complete, you can personalize it and make it your own!
We've shown one way you could personalize your star with a smiley face, so you could go with that or draw in some faces of your own!
You could also draw in some fun patterns or even leave it blank, and at this point it's up to you! We can't wait to see how you finish off your star drawing.
Step 7 – Now finish it off with some color
Your star drawing is now complete, and all that remains now is to bring it to life with some beautiful colors!
We've shown one way that you could color in your star drawing, but you should let your creativity run wild for this step!
Will you go for a traditional glowing yellow or bring your drawing to life with some bright and brilliant colors?
You could also experiment with different art mediums for some amazing color variations.
Using mediums such as acrylic paints, watercolors, colored pens and pencils can help you to achieve any look or mood that you can imagine!
We can't wait to see what colors, art mediums and styles you choose to finish off your awesome star drawings!
Your Star Drawing is Complete
With your final details and colors added, you have successfully learned how to draw a star!
We created this guide on how to draw a star in 7 easy steps to make this drawing challenge not only easier to tackle but also a lot more fun!
We really hope that this step-by-step guide was helpful and fun for you to use.
Remember that even the most challenging drawing tasks can be made so much easier if you break it down into manageable steps!
We're confident that if you follow this guide and try your best you will be drawing awesome stars in no time.
There is also a lot of room for you to get really creative and put your own spin on your star drawing!
Whether you do this by drawing on faces, patterns and styles or with different color choices and mediums, you can really put your own spin on your drawing.
We will be uploading lots of new drawing guides such as this one, so be sure to check our site out frequently to never miss out on the fun!
Once you've finished drawing and coloring in your star drawing, we hope that you will share it to our Facebook page for us to admire!
We always love to see how brilliantly creative you all get with your amazing artworks, and we can't wait to see your incredible star drawing artworks!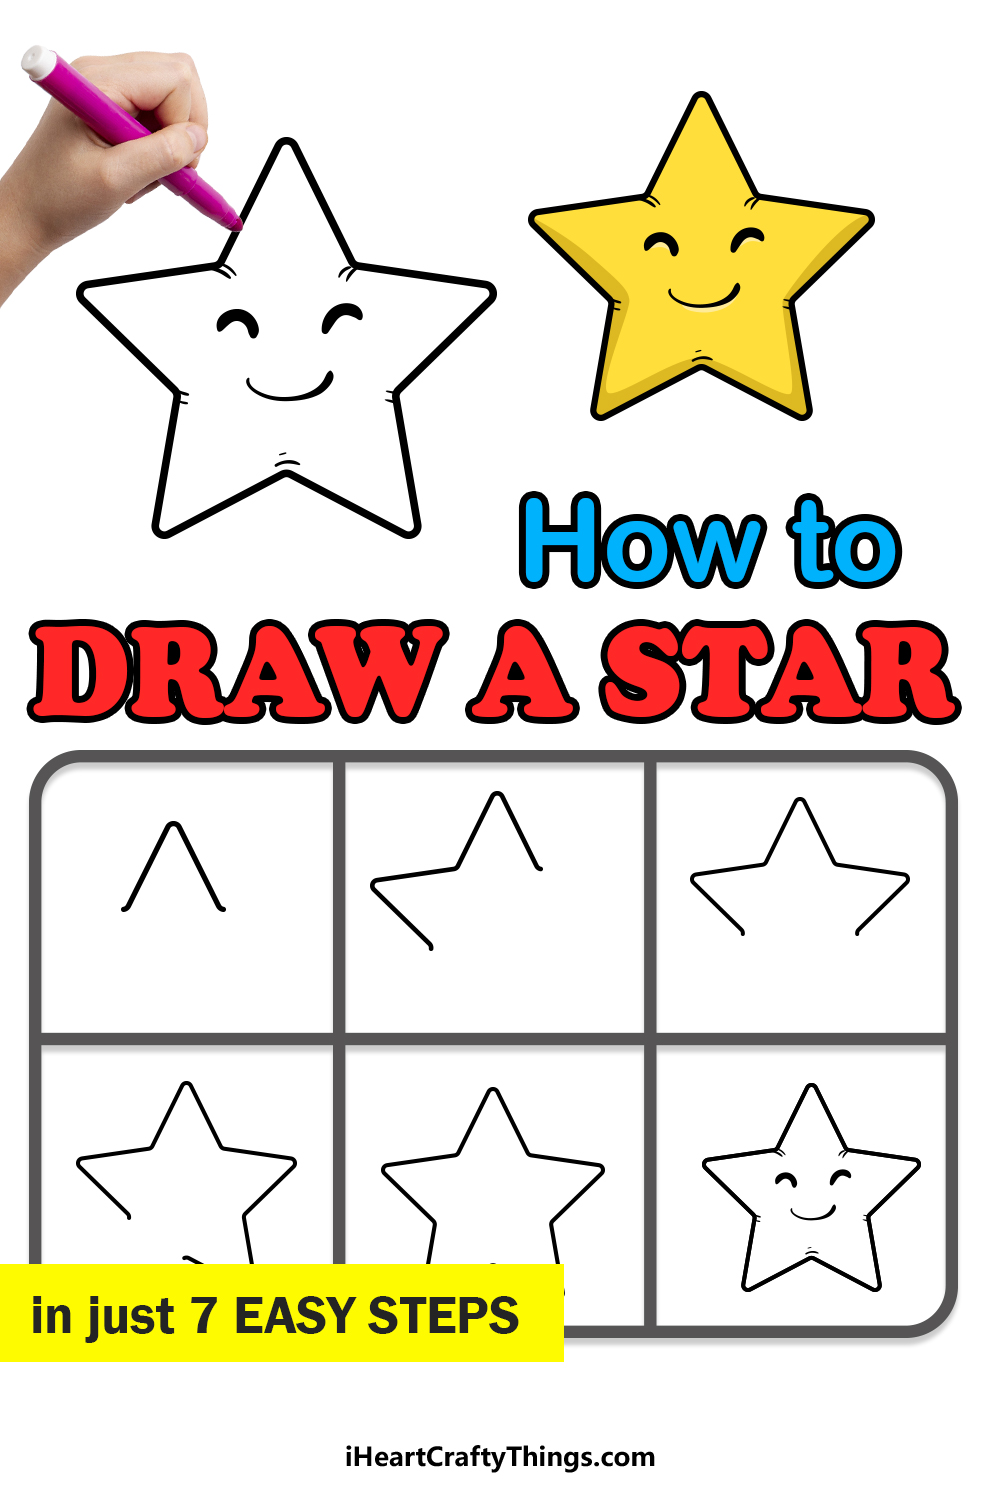
Night Sky Drawing Pencil Easy
Source: https://iheartcraftythings.com/star-drawing.html
Posted by: kennedyliaboarpood.blogspot.com
0 Response to "Night Sky Drawing Pencil Easy"
Post a Comment